Start your cross-border journey
Contact us now

Website development customer service

Customer Service


For newcomers who have just contacted WordPress, the most confusing place than its menu settings, many people do not know how to customize the WordPress menu, and the menu is the first place that each visitor will see, so the navigation menu is what we must set up!

WordPress menu is very powerful, but accordingly, set up some complexity, mainly less in line with the conventional use of habit. Like the domestic CMS systems such as Weideng, PHPCMS, navigation menu is the conventional practice is to default to the use of classification, and then classified below will automatically call the sub-categories, whenever the background to add something new, the menu will be automatically generated, basically can be ignored, do not need to set up too much.
In WordPress, the menu system is more complex, it is not a category as each section, but allows you to customize your own, the menu can be a post, page, category or external links, and all of these are set up in the dashboard, the user does not need to change the code will be able to customize, and you can create multiple sets of menus in order to facilitate the replacement of anytime!
Next we'll show you how to set up a WordPress menu and apply it to the navigation
To set up a WordPress navigation menu, you first need to find out where it is
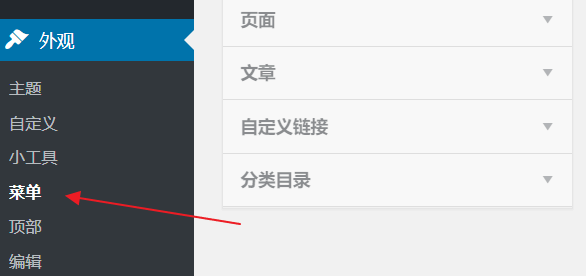
Open the Dashboard and select Appearance - Menu
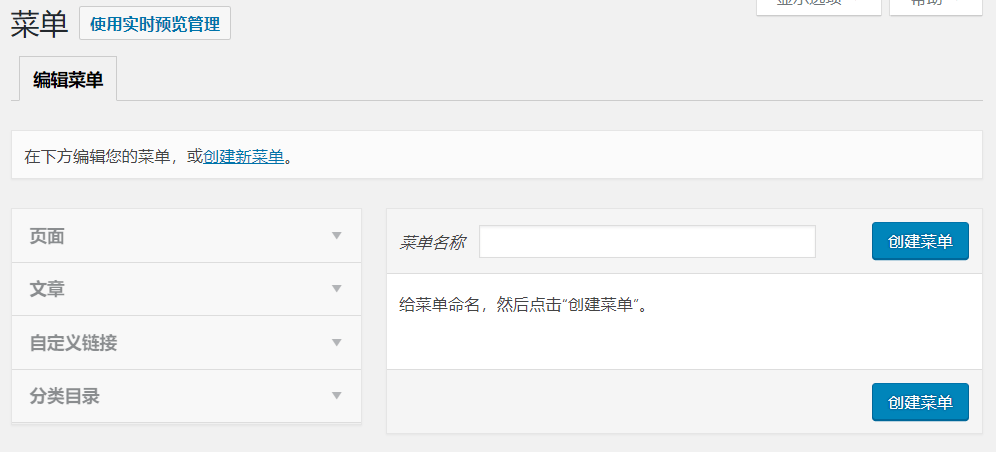
Enter the menu settings interface, you can see that there are 2 areas here, the left side of the site's content, including pages, articles, classified directories, custom links, the right side of the specific menu settings interface, used to adjust, edit the menu
There is no menu in WordPress by default, so we have to create one before we can set it up!

Click on the Create New Menu link above, then enter a name in the text box on the right, such as "Navigation Menu", and click on Create Menu.
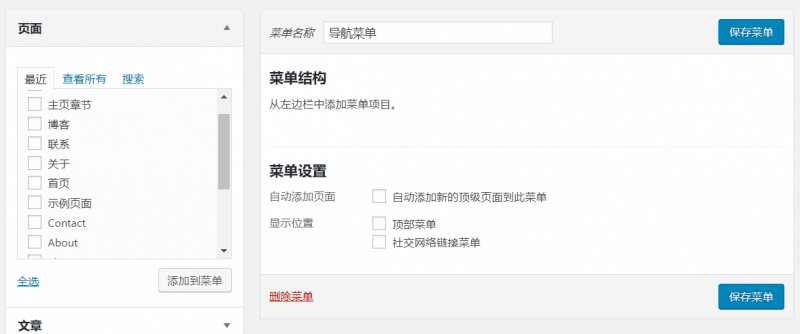
A new menu has been created, but there is no content in the menu at this time.
Next, set up the navigation menu
Adding items to the menu
Find the item you want to add to the menu on the left side, check it with your mouse and click Add to Menu.
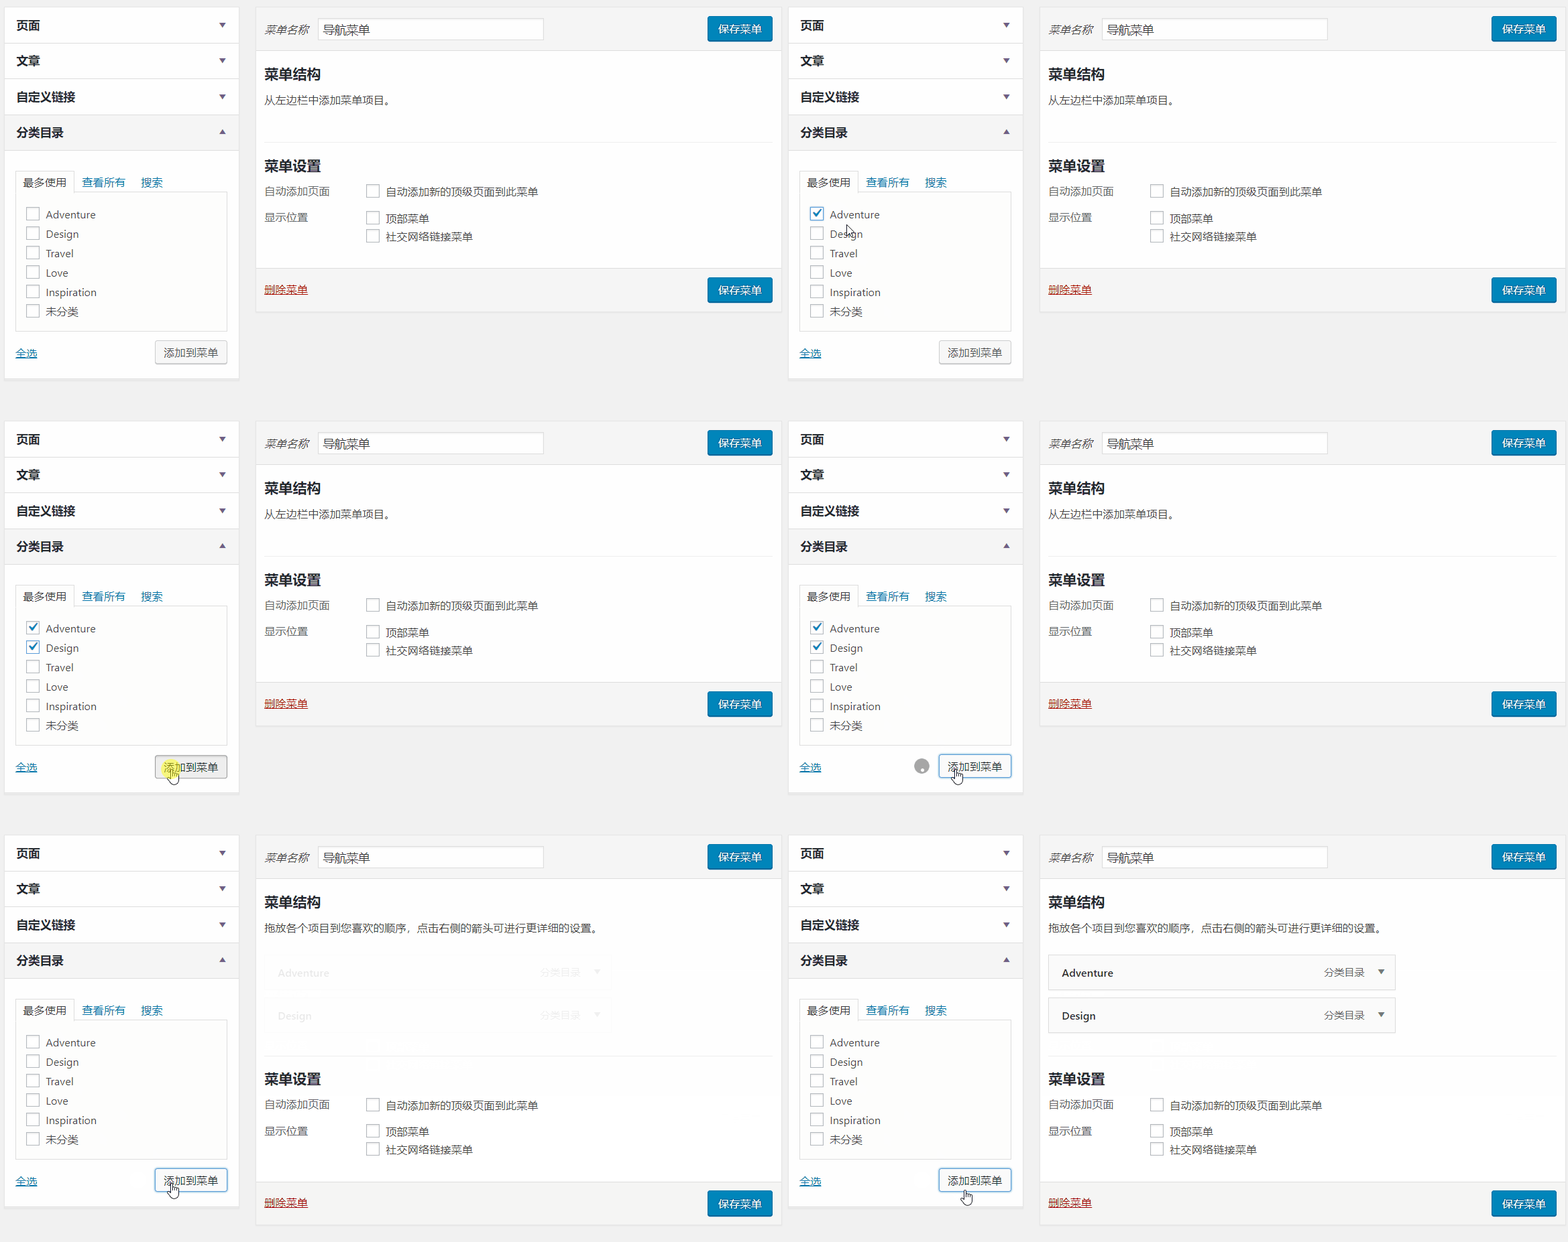
You'll see what you've just added in the menu structure on the right hand side
In the menu, you can add all the included content on the left side, pages, custom links, etc. can be added to the menu, this is the flexibility of WordPress!
Reordering the menus
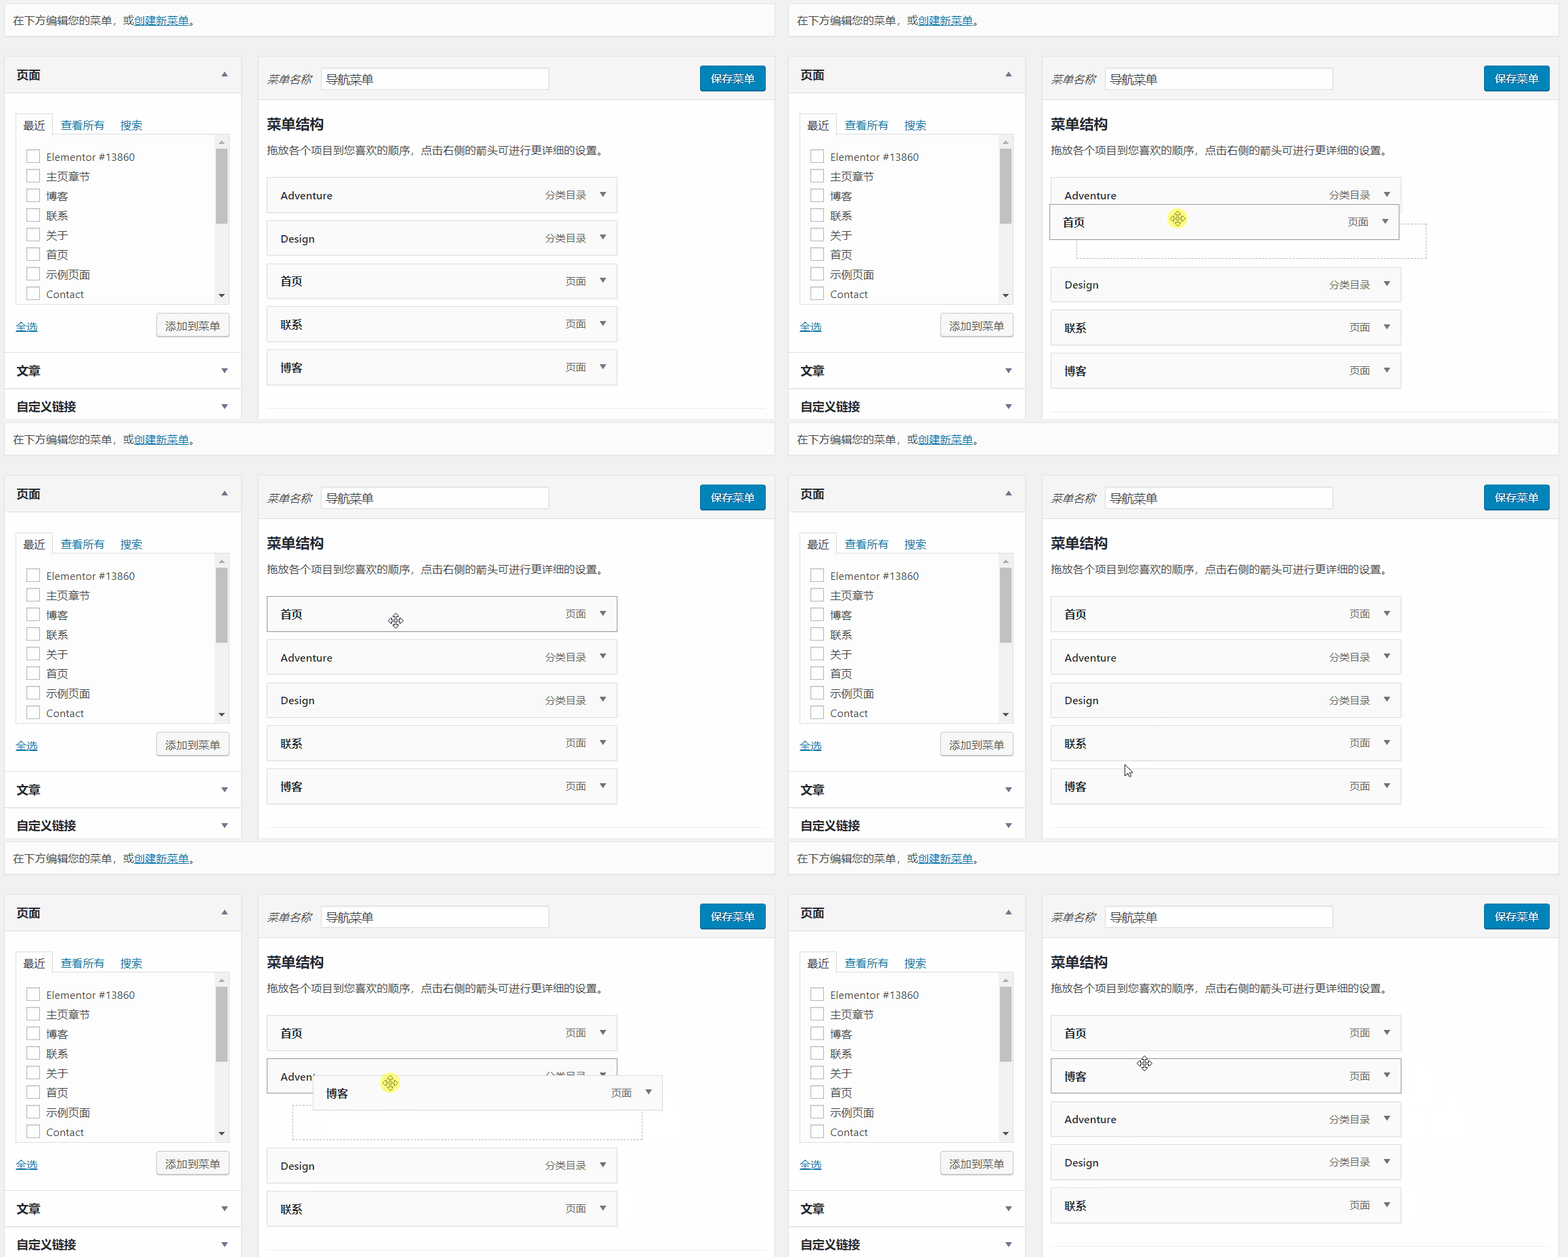
Sometimes we need some of the menu to the front, the unimportant menu to the end, this time you can adjust the order of menus
Press and hold the item you want to change the order of with the mouse on the right side and drag it to the correct position
Make the menu appear on the front of the site
The menu has been set up, and some of you may have saved it, only to find that nothing has changed on the front end of the site
So how do you get the menu to show up in the foreground?
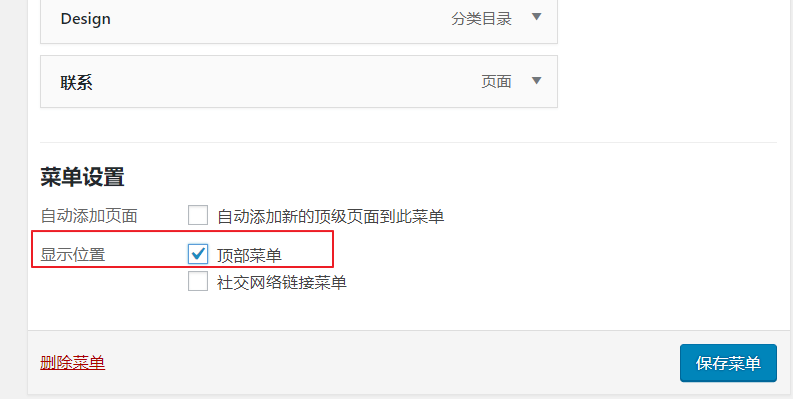
In the menu settings below, there is a display location options, here for the menu to assign the display location of the place, the default theme to choose the top menu on the line, if it is another theme, the name may be different!
Once you've set your settings, click on the Save menu
If the display location area has more than one menu, you need to find the right location to add, some themes will contain the top menu, navigation menu, bottom menu and other areas of the navigation menu, this time you need to add the right menu to fill these positions
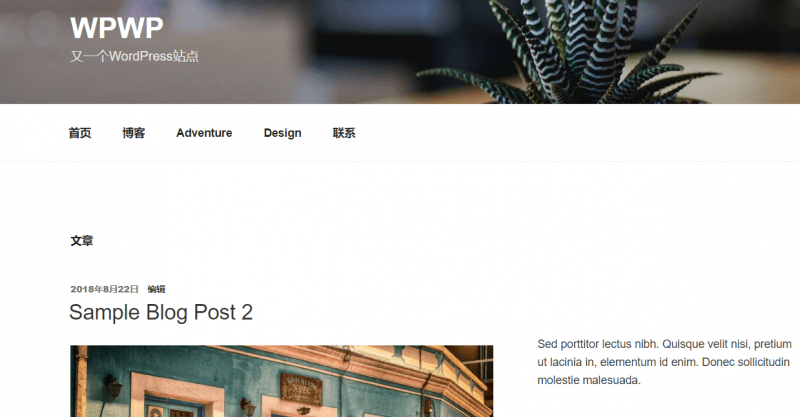
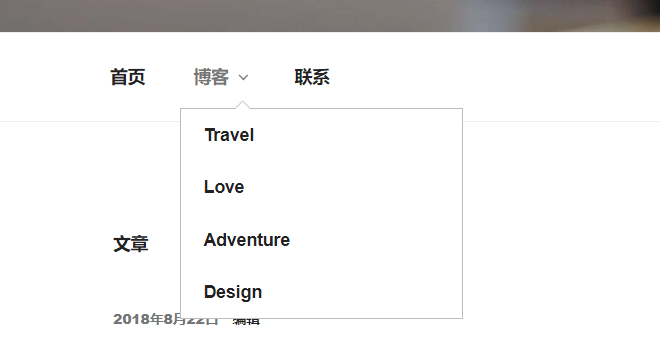
Finally the foreground display effect as shown on the figure, so that our menu has been set up!
In general, the default menu is completely enough to use. However, if your site has a complex structure or a lot of content, you will need more advanced menus, such as multi-level menus, mega menus.
Setting up multi-level menus
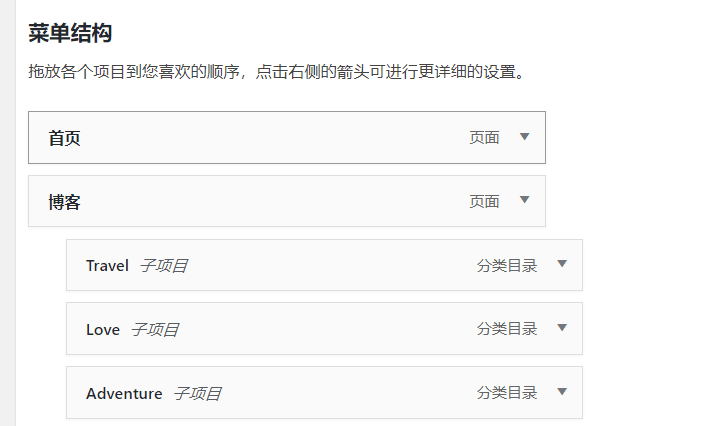
Sub-menus or multi-level menus are common styles for menus with more hierarchical structure.
Setting up a multi-level menu in WordPress is very easy, just drag the item under its parent level
